Articles by "TWITTER"
Showing posts with label TWITTER. Show all posts
Hacks,Tricks,Blogging Tricks ,Cool Computer Tricks ,Blogger Widget,Mobile Hack Tricks ,Auto like Trick,JavaScript,Coding,Magic Tricks,Facebook Tricks
We will organize this code to your site and Facebook Like, and +1 on google+, as well as tweet on Twitter! If you are looking to Your Social Bookmarks menu, this code is for you! This Social bookmark Helps you To Increase your Visiter .This is eye Catchy Widget Hopefully You like My Work :)

Preview

You Can See the preview Below


Copy This Code And Post in HTML/JAVASCRIPT widget


Hacks,Tricks,Blogging Tricks ,Cool Computer Tricks ,Blogger Widget,Mobile Hack Tricks ,Auto like Trick,JavaScript,Coding,Magic Tricks,Facebook Tricks

Code Friendly tripartite social intro splash screen, maybe this will be the code is ready for the most spectacular ever used! intro twitter, facebook google plus intro intro and holding together now!

 -Code in the facebook.com / Allcoder.blogspot.in link instead place their facebook page link. 

-Code in the twitter.com / Hiteshkatara place instead of their own twitter page link. 

-+1 button in the code, the code page of the currently displayed site +1  utility. For this reason, do not have a setting for the integration of google+.

Copy Code This And Past it in Html/Javascript Gadget 


  • This Has Cretive Common attribution License 
  • This is For Blogger and site use Purpose 
  • Dont Post this Post Without Admin Permission
Hacks,Tricks,Blogging Tricks ,Cool Computer Tricks ,Blogger Widget,Mobile Hack Tricks ,Auto like Trick,JavaScript,Coding,Magic Tricks,Facebook Tricks
Get New Footer Sticky Side Bar With Social Bookmark 


Hello Friends,today i Am Sharing The New And Coolest Footer Sticky Side bar.It will Make your Blogger Looks like Pretty Any Useful. When you Will open The Website It Will Automatically Hover and Open So Enjoy This Sticky Bar ORIGINALLY MADE By ALL-CODER

Follow The Steps Given below :) 
  1. Go to Layout
  2. Then Add Gadget > HTML/Javascript
  3. Paste Follwing Code In it


<!-- This Is A CopyRight Code.It Is Free To Use But With HTML Design Code. If AnyOne Found To Be Changing This Code Should Be Under Legal Action Via DMCA. Originally Made By All-Coder.blogspot.in-->
<style type="text/css">#acfixedfootermain{z-index:999999;width:300px;height:0px;position:fixed;bottom:0%;right:5px}#acfixedfooterdiv{border-top:3px solid #444;border-right:3px solid #444;border-left:3px solid #444;-moz-border-radius:6px;-webkit-border-radius:6px;border-radius:6px;background-color:#d7d7d7;overflow:none;width:300px;height:250px;position:fixed;bottom:0%;right:5px;background:#fff;background:-moz-linear-gradient(top, #fff 0%,#e5e5e5 100%);background:-webkit-gradient(linear,left top,left bottom,color-stop(0%,#fff),color-stop(100%,#e5e5e5));background:-webkit-linear-gradient(top, #fff 0%,#e5e5e5 100%);background:-o-linear-gradient(top, #fff 0%,#e5e5e5 100%);background:-ms-linear-gradient(top, #fff 0%,#e5e5e5 100%);background:linear-gradient(to bottom, #fff 0%,#e5e5e5 100%);filter:progid:DXImageTransform.Microsoft.gradient( startColorstr='#fff',endColorstr='#e5e5e5',GradientType=0 )}
#acfixedfooterhide{z-index:999999; position: absolute;    bottom:250px;right:5px;width:285px;height:25px;cursor:pointer;background-color:#fff;padding-top:5px;border-top:3px solid #444;border-left:3px solid #444;border-right:3px solid #444;border-top-right-radius:5px;border-top-left-radius:5px;}
#acfixedfootershow{position:absolute;    bottom:0px;    right:5px;    width:285px;height:25px;cursor:pointer;background-color:#e5e5e5;padding-top:5px;border-top:3px solid #444;border-left:3px solid #444;border-right:3px solid #444;border-top-right-radius:5px;border-top-left-radius:5px}.acfixedfooterdownarrow{width:0;height:0;border-left:10px solid transparent;border-right:10px solid transparent;border-top:10px solid #333}.acfixedfooteruparrow{width:0;height:0;border-left:10px solid transparent;border-right:10px solid transparent;border-bottom:10px solid #333}.acfixedfooterblockarrow{width:8px;height:10px;background-color:#333}#acfixedfootersocial{    position:absolute;    bottom:220px;    right:10px;    width:280px;height:30px;float:right}#acfixedfootersocialicon{    position:absolute;    bottom:135px;    left:10px;    width:auto;height:64px}#acfixedfooteremailsubscribe{    position:absolute;    bottom:0px;    width:242px;height:90px;right:30px}.acfixedfooteremailsubscribebox input.email{padding:7px 10px 7px 10px;font-family:"Arial","Helvetica",sans-serif;width:218px;font-size:12px;-webkit-border-radius:5px;-moz-border-radius:5px;border-radius:5px}.acfixedfooteremailsubscribebox input.subscribe{    -moz-box-shadow:inset 0px 1px 0px 0px #fff;-webkit-box-shadow:inset 0px 1px 0px 0px #fff;box-shadow:inset 0px 1px 0px 0px #fff;background:-webkit-gradient( linear,left top,left bottom,color-stop(0.05,#f0f0f0),color-stop(1,#c9c9c9) );background:-moz-linear-gradient( center top,#f0f0f0 5%,#c9c9c9 100% );filter:progid:DXImageTransform.Microsoft.gradient(startColorstr='#f0f0f0',endColorstr='#c9c9c9');background-color:#f0f0f0;-moz-border-radius:6px;-webkit-border-radius:6px;border-radius:6px;border:1px solid #dcdcdc;display:inline-block;color:#777;font-family:arial;font-size:13px;font-weight:bold;padding:6px 18px;text-decoration:none;text-shadow:1px 1px 0px #fff}.acfixedfooteremailsubscribebox input.subscribe:hover{background:-webkit-gradient( linear,left top,left bottom,color-stop(0.05,#c9c9c9),color-stop(1,#f0f0f0) );background:-moz-linear-gradient( center top,#c9c9c9 5%,#f0f0f0 100% );filter:progid:DXImageTransform.Microsoft.gradient(startColorstr='#c9c9c9',endColorstr='#f0f0f0');background-color:#c9c9c9}</style><!--[if IE]><style>.acfixedfooteremailsubscribebox input.subscribe{width:243px}</style><![endif]--><!--[if gte IE 9]><style type="text/css">.gradient{filter:none}</style><![endif]--><div id="acfixedfootermain"><center id="acfixedfootershow" onmouseup="document.getElementById('acfixedfooterdiv').style.display='block'"><table style="margin-top:-2px;"><tbody><tr><td><center style="color:#333;font-size:15px;font-weight:bold;">Be Socialized And Subscribed</center></td><td><center><div class="acfixedfooteruparrow"></div><div class="acfixedfooterblockarrow"></div></center></td></tr></tbody></table></center><div id="acfixedfooterdiv" style="display: block;"><center id="acfixedfooterhide" onmouseup="document.getElementById('acfixedfooterdiv').style.display='none'"><table style="margin-top:-2px;"><tbody><tr><td><center style="color:#333;font-size:15px;font-weight:bold;">Be Socialized And Subscribed</center></td><td><center><div class="acfixedfooterblockarrow"></div><div class="acfixedfooterdownarrow"></div></center></td></tr></tbody></table></center><div id="acfixedfootersocial"><center style="color:#333;font-size:12px;">Recive All Latest And Hottest Articles,Tips And Tricks,Awesome Widgets Directly Into Your <span id="IL_AD3" class="IL_AD">Inbox</span> And Stay UpDate With Us...!!!</center></div><div id="acfixedfootersocialicon"><table><tbody><tr><td><a href="YOUR-FACEBOOK-PAGE-URL-HERE"><img height="48px" width="48px" title="Like Us On Facebook" alt="Facebook" src="https://blogger.googleusercontent.com/img/b/R29vZ2xl/AVvXsEi2u29B75epGZ4_lfZSFDPdALiK63abKWVe8RIgs3CSPdyUPIbzl2_uDk8klRD17OeMbZNMFhwHG_k-mgcdiCJYp2zh77evIFCzefYN8xLHRl60aKgJQA7sGhuN-OXgrGAzogp1K6-HC6-k/s1600/Facebook+Icon.png" onmouseover="this.src=&#39;https://blogger.googleusercontent.com/img/b/R29vZ2xl/AVvXsEhEzi4uGvSUx0je5K3kUcFtH7tL9i5w9cxwDvXM14cDjeqeY38m6rXUZVnRF5tWJnDv4qSVesoGAXf5931AEq3OYpHu7yOQpBzYcfFRSnZe5EU4J3uZkwLGBg7AVHmNqUlXWWd5BYWJn09y/s1600/Facebook+Rollout+Image.png&#39;" onmouseout="this.src=&#39;https://blogger.googleusercontent.com/img/b/R29vZ2xl/AVvXsEi2u29B75epGZ4_lfZSFDPdALiK63abKWVe8RIgs3CSPdyUPIbzl2_uDk8klRD17OeMbZNMFhwHG_k-mgcdiCJYp2zh77evIFCzefYN8xLHRl60aKgJQA7sGhuN-OXgrGAzogp1K6-HC6-k/s1600/Facebook+Icon.png&#39;" /></a><br /><a href="YOUR-TWITTER-URL-HERE"><img height="48px" width="48px" title="Follow Me On Twitter" alt="Twitter" src="https://blogger.googleusercontent.com/img/b/R29vZ2xl/AVvXsEidaP9QApdG8_wzOHm7bKRwyHKy4B2GMfE-QYHktrVwXvk2TnNwOSY3OCtjF3ynnlX4jR73UCwwMaww8rfimsftg2HunQw_we_4faHZ8ITsiNDKI9iUjD1J1OAvhA0xURzpJ5EioDzgVeDO/s1600/Twitter+Icon.png" onmouseover="this.src=&#39;https://blogger.googleusercontent.com/img/b/R29vZ2xl/AVvXsEiG7NEUaG5luagnUIX4IvG3Ws8HM2uEzvOvNzKatBykcoQR-hPNBVKn_89w1HjKnzYvU0AH7I0ZwEiq9So1nMhYSl0yK1zMWHw_XutLIz4AE3eSmu5_Gkt1Qexvk5vGXKTbswxyhyHhyphenhyphenZi9/s1600/Twitter+Rollout+Image.png&#39;" onmouseout="this.src=&#39;https://blogger.googleusercontent.com/img/b/R29vZ2xl/AVvXsEidaP9QApdG8_wzOHm7bKRwyHKy4B2GMfE-QYHktrVwXvk2TnNwOSY3OCtjF3ynnlX4jR73UCwwMaww8rfimsftg2HunQw_we_4faHZ8ITsiNDKI9iUjD1J1OAvhA0xURzpJ5EioDzgVeDO/s1600/Twitter+Icon.png&#39;" /></a></td><td width="75px" valign="top"><a style="font-size:12px;color:#333;font-weight:bold;" href="YOUR-FACEBOOK-PAGE-URL-HERE">Like Us On FaceBook</a><br /><br /><a style="font-size:12px;color:#333;font-weight:bold;" href="YOUR-TWITTER-URL-HERE">Follow Us On Twitter</a></td><td><a href="YOUR-GOOGLE-PLUS-URL-HERE"><img height="48px" width="48px" title="Add Us To Your Circle" alt="Google Plus" src="https://blogger.googleusercontent.com/img/b/R29vZ2xl/AVvXsEghwDP76GcvSx9N3wS2-P-smBM-i77snv_nQBd5s-LqWBCZ7KTKOwHSMzAFx3wUrjeomq6A3UN5dlTqNGV2QUTPngsIkdWmmMnug94Q0UPN5Hn-MNXCj-isC9o4hrkiKTszJgZ4vreIe8bg/s1600/Google+Icon.pngE" onmouseover="this.src=&#39;https://blogger.googleusercontent.com/img/b/R29vZ2xl/AVvXsEi6_RgmhsxKM1QvFbXJ6W-GceRn7hFzm62yPVo2J6Hh7oO0JmMzf5kyEB-WsQkAB7BmpWqjWJkp12dsxQUdcjYYxgsrLgHpt8pLVd-xKTIxm4EcviDorB4AF7YueC8FDS1Ptyn-eije5VWC/s1600/Google+Rollout+Image.png&#39;" onmouseout="this.src=&#39;https://blogger.googleusercontent.com/img/b/R29vZ2xl/AVvXsEghwDP76GcvSx9N3wS2-P-smBM-i77snv_nQBd5s-LqWBCZ7KTKOwHSMzAFx3wUrjeomq6A3UN5dlTqNGV2QUTPngsIkdWmmMnug94Q0UPN5Hn-MNXCj-isC9o4hrkiKTszJgZ4vreIe8bg/s1600/Google+Icon.png&#39;" /></a><br /><a href="YOUR-EMAIL-RSS-URL-HERE"><img height="48px" width="48px" title="Subscribe Our RSS" alt="RSS" src="https://blogger.googleusercontent.com/img/b/R29vZ2xl/AVvXsEgKBECT_h0d5V3xofmpMGguFDyrwLlQNGSgmt5A_66mR5mQPgDJXA6u6YN2d6b1oi6o8wgimIaCSLUit2ngsl82Xtt-2_h-WIskCb5IeQps5fX1ot5fS8dnxF0pOHInn2DE5-dV6kLS-GKR/s1600/Feedburner+Icon.png" onmouseover="this.src=&#39;https://blogger.googleusercontent.com/img/b/R29vZ2xl/AVvXsEghA2iV4LNF1X6B6wtaT7GFtl6TOuA3CBuQP2YX2jPJCfnh_oKf5ZhzWhHs-OtP5SE6Jeph-b2Q5wSXZqbA08oiNqMYLklxcY-5A8-m9EIVYGhS5pvDw1Xh3305_5pae11S8_UsLABBQRTp/s1600/Feedburner+Rollout+Image.png&#39;" onmouseout="this.src=&#39;https://blogger.googleusercontent.com/img/b/R29vZ2xl/AVvXsEgKBECT_h0d5V3xofmpMGguFDyrwLlQNGSgmt5A_66mR5mQPgDJXA6u6YN2d6b1oi6o8wgimIaCSLUit2ngsl82Xtt-2_h-WIskCb5IeQps5fX1ot5fS8dnxF0pOHInn2DE5-dV6kLS-GKR/s1600/Feedburner+Icon.png&#39;" /></a></td><td valign="top"><a style="font-size:12px;color:#333;font-weight:bold;" href="YOUR-GOOGLE-PLUS-URL-HERE">Add Me <br />In Circle</a><br /><br /><a style="font-size:12px;color:#333;font-weight:bold;" href="YOUR-EMAIL-RSS-URL-HERE">Subscribe <br />Our RSS</a></td></tr></tbody></table></div><div id="acfixedfooteremailsubscribe"><div class="acfixedfooteremailsubscribebox"><form action="http://feedburner.google.com/fb/a/mailverify" method="post" target="popupwindow" onsubmit="window.open('http://feedburner.google.com/fb/a/mailverify?uri=acfixedfootersocialicon','popupwindow','scrollbars=yes,width=550,height=520');return true"><input class="email" type="text" id="email" name="email" value="Enter Your Email Here.." onfocus="if(this.value==this.defaultValue)this.value=&#39;&#39;;" onblur="if(this.value==&#39;&#39;)this.value=this.defaultValue;" /><input type="hidden" value="YOUR-FEED-VALUE-HERE" name="uri" /><input type="hidden" name="loc" value="en_US" /><br /><input class="subscribe" name="commit" type="submit" value="Subscribe Our News Letter Now" /></form></div><center style="color:#333;font-size:8px;">E-Mail Will Be Delivered By FeedBurner.<a href="http://all-coder.blogspot.in/2013/02/new-version-footer-sticky-side-bar-with.html">+Get this</a></center></div></div></div><!-- This Is A CopyRight Code.It Is Free To Use But With HTML Design Code.If AnyOne Found To Be Changing This Code Should Be Under Legal Action Via DMCA.Originally Made By All-Coder.blogspot.in -->
Note: Replace the following sections with your social profiles and feed URLs.

  • YOUR-FACEBOOK-PAGE-URL-HERE
  • YOUR-TWITTER-URL-HERE
  • YOUR-FEED-VALUE-HERE
  • YOUR-EMAIL-RSS-URL-HERE
  • YOUR-GOOGLE-PLUS-URL-HERE
4. Save it.

That's it you have a very cool subscribe section on your blog. Thanks for reading it.
Hacks,Tricks,Blogging Tricks ,Cool Computer Tricks ,Blogger Widget,Mobile Hack Tricks ,Auto like Trick,JavaScript,Coding,Magic Tricks,Facebook Tricks
Now we can think for a different way in sharing our posts. We added share buttons on the footer of the post, header of the post and even on the side of the post as a floating one. But do you want to add sharing buttons like facebook, twitter and email button on images on its hover view ? Yes, the world's largest social sharing platform AddThis made that for us. I was waiting for such a widget. Aren't you ?


addthis


[[ To Veiw This Click The "Gadged Demo" Button Given above ]]


How To Install The Widget On Blogger ? 


You can install this widget by some simple steps. What you have to do is just do these steps without any mistake. 

  • Log in to blogger.
  • Go to the templates tab.
  • Find this code [ press Ctrl+F on keyboard ] :
</head>

  • Before the code given above, paste this code : 

<script src="http://s7.addthis.com/js/250/addthis_widget.js" type="text/javascript">
<style>
var addthis_config = {
services_overlay:'facebook,twitter,email,print,more'
}
</style>
</script>

  • Save the template.
  • Done. 

Now you had installed the widget on blogger. Now you have to add the AddThis share code to the images that you want the widget to appear.

Placing Code On Images For Appearing Buttons


You can see the share buttons only if you add code to individual images for seeing the share buttons. So please follow these steps : 

Whenever you add an image on blogger it probably look like this if you had uploaded the image through blogger. 


<div class="separator" style="clear: both; text-align: center;">
<a href="http://2.bp.blogspot.com/-oy00gQc-YGY/T6IpnIA8y_I/AAAAAAAAAEY/zUQHumN3eW8/s1600/header+2.jpg" imageanchor="1" style="margin-left: 1em; margin-right: 1em;"><img border="0" height="49" src="http://2.bp.blogspot.com/-oy00gQc-YGY/T6IpnIA8y_I/AAAAAAAAAEY/zUQHumN3eW8/s320/header+2.jpg" width="320" /></a></div>

The AddThis code used for giving share button to images is :

 class="addthis_shareable"

<div class="separator" - change this code with <div class="addthis_shareable".


If you had uploaded the image through a url from other website, it probably looks like this : 


<a href="IMAGE URL" imageanchor="1" style="margin-left: 1em; margin-right: 1em;"><img alt="blogger" border="0"  height="315" src="IMAGE URL" title="Blogger Logo " width="320" /></a></div>


Add the Addthis code before this code : 


 height="315" src="IMAGE URL" title

By adding the addthis code, it looks like this :


class="addthis_shareable" height="315" src="

Now you have learnt how to add the AddThis code for placing share buttons on images.

What Are The Main Advantages Of The Widget ? 


The main reason is that people generally dislike to share the posts through the buttons below post title and below post. But they likes to share the post via an image. The main example for that is pinterest. Its share button generally includes Facebook, twitter, email, print and more button. The AddThis more button allows the users to see all types sharing and bookmarking services. So in my opinion, this widget could give you more shares for your post and everyone must add this on your blog.

For adding more services to the widget, visit this link : http://www.addthis.com/services/list . This link contains complete AddThis share codes.


TIP : The widget will be active the complete loading of the webpage.
Hacks,Tricks,Blogging Tricks ,Cool Computer Tricks ,Blogger Widget,Mobile Hack Tricks ,Auto like Trick,JavaScript,Coding,Magic Tricks,Facebook Tricks


force visitors to subscribeaToday we will not just learn how to create a new eye-catching subscription box but we will get into some Email List tactics that you should learn in order to turn Every Visitor into a Reader. A Blog with no readership equals a body with no soul. Nothing matters more at least for me than readers who read, share and circulate your content. Revenue and advertisements are secondary elements of blogging but what counts a lot is your strong Email List.

The more readers you have, the less dependent you get on search engines and more attractive you become to advertisers. The first thing that any sponsor sees is your total blog subscribers may that be from Feedburner, Twitter, Facebook or our new GOOGLE+. People will choose the option that is most flexible to them. So are you offering an easy and flexible method for your visitors to receive your daily updates? Of course most of you do but you often under-estimate one Magic tip! That is the design and Position of your subscription box.

How To Increase Blog Subscribers?

The answer to this question is simple. Place your subscription box right at the top just below header and above all advertisements. You can clearly see it on my blog. I could have shifted the BSA ads to the Top right but instead we added the RSS Email form above all advertisements because we know the worth of a reader. The first section that loads on a any browser is your Blog header and then elements just below it. This is the magic position which attracts a visitor's attention the most plus it is one region that has the highest page impressions. Sponsors pay a lot for this Top Right Position on a Blog sidebar and then reason as I mentioned is to force the visitor to notice and click the Ad.
If you take a tour of famous blogs, you will observe that almost everyone is using the same Top-Right Position for placing their Subscription box. I would highly recommend that you make this new shift as soon as possible. It's the only effective way to grow your Email list.

What Must a Subscription Box Contain?

Your subscriber's form may not just contain links to your RSS Feed and a RSS Email form. You should add all your social media profiles to it. Its like providing the visitor with multiple choices of subscription. Normally we choose the biggest giants like Facebook, Twitter and now indeed Google+. A complete subscriber Form contains RSS option along with social media buttons. 

How to create a Subscription Box?

If that is your question then I guess you have landed at the right place. We have so far designed various combinations of Subscriber Boxes and you can find our free old versions by visiting the link below,

Lets now create another cool widget that will blend perfectly on blogs that prefer simplicity and less-bright colors. This widget is compatible with all major browsers including IE8. I have used conditional statements to make it work perfectly with IE8.
Follow these easy installation guide.
  1. Go To Blogger > Design
  2. Select HTML/JavaScript gadget
  3. Add the follow code inside it

<style type='text/css'>
.sh a{
color: #6e6e6e;
font: bold 12px Helvetica, Arial, sans-serif;
text-decoration: none;
padding: 7px 12px;
position: relative;
display: inline-block;
text-shadow: 0 1px 0 #fff;
-webkit-transition: border-color .218s;
-moz-transition: border .218s;
-o-transition: border-color .218s;
transition: border-color .218s;
background: #f3f3f3;
background: -webkit-gradient(linear,0% 40%,0% 70%,from(#F5F5F5),to(#F1F1F1));
background: -moz-linear-gradient(linear,0% 40%,0% 70%,from(#F5F5F5),to(#F1F1F1));
border: solid 1px #dcdcdc;
border-radius: 2px;
-webkit-border-radius: 2px;
-moz-border-radius: 2px;
}
.sh a:hover {
color: #333;
border-color: #999;
-moz-box-shadow: 0 2px 0 rgba(0, 0, 0, 0.2)
-webkit-box-shadow:0 2px 5px rgba(0, 0, 0, 0.2);
box-shadow: 0 1px 2px rgba(0, 0, 0, 0.15);
}
.sh a:active {
color: #000;
border-color: #444;
}

.shbar{ width:280px; float: left; margin-left:3px; margin-top:5px; padding:0;}
.shbar .emailsub{border-bottom: 0px solid #e6e6e6; padding: 0px 0 15px 0; float: left; width: 100%; font-family: Helvetica, Arial;}
.shbar .emailsub .emailupdatesform{width: 100%; float: right; padding:0px;}
.shbar .emailsub .emailupdatesform input.emailupdatesinput{background: #F3F3F3; float: left; border: 1px solid #dcdcdc; padding: 0px 8px; color: #989898; font-size: 14px; width: 130px; height:30px; border-radius: 2px;
-webkit-border-radius: 2px;
-moz-border-radius: 2px;}
.shbar .emailsub .emailupdatesform input.emailupdatesinput:hover{
border-color: #999;
-moz-box-shadow: 0 2px 0 rgba(0, 0, 0, 0.2)
-webkit-box-shadow:0 2px 5px rgba(0, 0, 0, 0.2);
box-shadow: 0 1px 2px rgba(0, 0, 0, 0.15);
}

.shbar .emailsub .emailupdatesform input.joinemailupdates:hover{ border-color: #666;
-moz-box-shadow: 0 2px 0 rgba(0, 0, 0, 0.2)
-webkit-box-shadow:0 2px 5px rgba(0, 0, 0, 0.2);
box-shadow: 0 1px 2px rgba(0, 0, 0, 0.15); cursor:pointer;
}
.shbar .emailsub .emailupdatesform input.joinemailupdates{
border: solid 1px #dcdcdc;
background: #F3F3F3;
font-family:Helvetica, Arial;
text-transform: none; color: #989898; height: 25px; padding: 0 10px; margin: 0 0 0 5px; font-weight:bold; font-size:14px; height:30px;
border-radius: 2px;
-webkit-border-radius: 2px;
-moz-border-radius: 2px;
}

.shbar .emailsub .emailupdatesform input.emailupdatesinput{background: #F3F3F3; float: left; border: 1px solid #dcdcdc; padding: 0px 8px; color: #989898; font-size: 14px; width: 145px; height:28px; border-radius: 2px;
-webkit-border-radius: 2px;
-moz-border-radius: 2px;}
.shbar .emailsub .emailupdatesform input.joinemailupdates{
border: solid 1px #dcdcdc;
background: #F3F3F3;
font-family:Helvetica, Arial;
text-transform: none; color: #989898; height: 25px; padding: 0 0px; margin: 0 0 0 5px; font-weight:bold; font-size:14px; height:30px;
border-radius: 2px;
-webkit-border-radius: 2px;
-moz-border-radius: 2px;
}
</style>

<!--[if IE 8]> <style>
.shbar .emailsub .emailupdatesform input.emailupdatesinput{background: #F3F3F3; float: left; border: 1px solid #dcdcdc; padding: 5px 10px; color: #989898; font-size: 12px; width: 130px; height:18px; border-radius: 2px;
-webkit-border-radius: 2px;
-moz-border-radius: 2px;}
.shbar .emailsub .emailupdatesform input.joinemailupdates{
border: solid 1px #dcdcdc;
background: #F3F3F3;
font-family:Helvetica, Arial;
text-transform: none; color: #989898; height: 25px; padding: 0 5px; margin: 0 0 0 5px; font-weight:bold; font-size:14px; height:30px;
border-radius: 2px;
-webkit-border-radius: 2px;
-moz-border-radius: 2px;
}


</style> <![endif]-->


<div class="sh" style="padding: 0pt 0pt 0pt 5px;">
<table><tbody><tr>
<td>
<a href="
ADD-FEEDBURNER-LINK-HERE" rel="nofollow" target="_blank"><img src="https://blogger.googleusercontent.com/img/b/R29vZ2xl/AVvXsEhJC_JHFYjmIMmrc43LdwcsrJZq3ESOW9tPf9tm3tiPavUig5XEMjg23O5vRkYPKxXSQWZ9b1yzCeCgiSHc9pattB14mIUCdlGygwRG4W4_C9buXy_n7PerghmND4kZSJM8zM0XOaubDGc/s1600/rss.png" border="0"></a>
</td>
<td>
<a style="margin-left:5px;"href="
ADD-TWITTER-FAN-PAGE-LINK-HERE" rel="nofollow" target="_blank"><img src="https://blogger.googleusercontent.com/img/b/R29vZ2xl/AVvXsEiVsZzTp7Mx2y1aViyLrTFBEcYhOZa95EZ8vgc4Rpbyvsedsdcm7S93O8Z0lZ_7LHXQYV9TM1hmgufz8LpmTxfhayP6vu_L-Hh-eorJg7XJ2E3UUpMJnh8FIgFFLaVO3xe5nup-YnF6cps/s1600/twitter.png" border="0"></a>
</td>
<td>
<a style="margin-left:5px;"href="
ADD-FACEBOOK-FAN-PAGE-LINK-HERE" rel="nofollow" target="_blank"><img src="https://blogger.googleusercontent.com/img/b/R29vZ2xl/AVvXsEgXFD6pCwgrLakhQTNbte4mkMiuIa8ngYY7FKrfbS9Mnk-3PZC3-PWuqfoYitKLni-aPfL2Y0HA6IXmz6a_UkG8WZ5O-CiCKYdDN25V5MLHuf-qWJG6fv7gYkbjl87IWuBaPM2YQi5CBwA/s1600/facebook.png" border="0"></a>
</td>
</tr></tbody></table>
<div class="shbar">
<div class="emailsub">
<div class="emailupdatesform">
<form action="http://feedburner.google.com/fb/a/mailverify" method="post" target="popupwindow" onsubmit="window.open('http://feedburner.google.com/fb/a/mailverify?uri=
Studhacking', 'popupwindow', 'scrollbars=yes,width=550,height=520');return true"><input gtbfieldid="10" class="emailupdatesinput" name="email" value="Submit email..." onblur="if (this.value == &#39;&#39;) {this.value = &#39;Submit email...&#39;;}" onfocus="if (this.value == &#39;Submit email...&#39;) {this.value = &#39;&#39;;}" type="text" /><input value="Studhacking" name="uri" type="hidden" /><input value="Subscribe" class="joinemailupdates" type="submit" /></form></div></div></div></div>
</div>


Make these changes:

Replace ADD-FEEDBURNER-LINK-HERE with your Feedburner link which looks like this: http://feeds.feedburner.com/TntByStc

Replace the other two bolded texts with your Facebook and Twitter links.

Replace StudHacking with the Feedburner RSS Email Title which is always written at the end of your FEED Email Link as shown below,

http://feedburner.google.com/fb/a/mailverify?uri=StudHacking

    4.  Give your widget a Title and Save it.
    5.   You are all done!
Visit your blogs and make sure you have added it to the top most position on your sidebar. You will surely see a change in the number of your subscribers very soon provided that youpost consistently.  Happy blogging! :)

Hacks,Tricks,Blogging Tricks ,Cool Computer Tricks ,Blogger Widget,Mobile Hack Tricks ,Auto like Trick,JavaScript,Coding,Magic Tricks,Facebook Tricks


Touch Me Sharing WidgetThe rapid advancement and development of Social Media and growing interest of people in social networking sites has given birth to dozens of social sharing tools and services. Web masters are getting addicted to these tools because unlike organic traffic from search engines, web traffic from social channels have overtaken search traffic. Bloggers today depend largely on networks like Facebook, Google plus and twitter to drive traffic to their blogs. These tools are good only if they can attract a visitor to bookmark and share your content. From your website quality content till your blog design, every single bit counts in turning a visitor into a follower. To help you with your dream of increasing  fans and readers we bring you "Touch Me". Its named such due to its appealing look that forces a visitor to roll hover the cursor over the icons and hit follow! :) This gadget is neatly structured using buttons from popular services like Google Plus, Facebook, Twitter and RSS. We have coded it neatly using basic HTML and some spicy CSS styles.


Previous Version

Social Sharing Button With Hover Effect V1


Please take less than a minute to like and bookmark this page as a token of favor for our small effort. :)

Where should you add it?

Its is standard practice to add social counters inside posts and social sharing buttons in a sidebar. I would therefore advise that you add this widget towards the top right section of your blog above all ads and gadgets.

Add it to blogger

I am sharing below the steps for BlogSpot users. If you are a wordpress or Joomla user or running a normal website then you just need to copy and paste the following code inside your templates.
Following are the steps for blogger users
  1. Go To Blogger > Layout
  2. Choose add a gadget
  3. Select HTML/JavaScript
  4. Paste the following code inside it, 

<style>
/*--------Touch Me Sharing Widget ------*/
.touchme a {
display:block;
height:50px;
width:50px;
padding:0 4px;
float:left;
background:transparent url(http://mybloggertricks.googlecode.com/files/Sharing%20Touch%20Me.png) no-repeat;
-webkit-transition: ease-in 0.2s all;
-moz-transition: ease-in 0.2s all;
-o-transition: ease-in 0.2s all;
-ms-transition: ease-in 0.2s all;
transition: ease-in 0.2s all;
cursor:pointer;
}

.touchme a.googleplus {
background-position: 0px -58px;
}
.touchme a.googleplus:hover {
background-position: 0px 0px;
}

.touchme a.twitter {
background-position: 0px -290px;
}
.touchme a.twitter:hover {
background-position: 0px -232px;
}
.touchme a.facebook {
background-position: 0px -406px;
}
.touchme a.facebook:hover {
background-position: 0px -348px;
}

.touchme a.rss {
background-position: 0px -174px;
}
.touchme a.rss:hover {
background-position: 0px -116px;
}

</style>

<div class='touchme'>
<!--RSS-->
<a class='rss' href="YOUR RSS LINK" rel='external nofollow' target='_blank'></a>
<!--Google Plus-->
<a class='googleplus' href="YOUR GOOGLE PROFILE LINK" rel='external nofollow' target='_blank'></a>
<!--Facebook-->
<a class='facebook' href="YOUR FACEBOOK LINK" rel='external nofollow' target='_blank'></a>
<!-- Twitter -->
<a class='twitter' href="YOUR TWITTER LINK" rel='external nofollow' target='_blank' ></a>

</div>

Please fill these requirements:
  • Replace YOUR RSS LINK with your Feed burner link.
  • Replace YOUR GOOGLE PROFILE LINK with your Google+ URL
  • Replace YOUR FACEBOOK LINK with your Facebook URL
  • Replace YOUR TWITTER LINK with your Twitter Profile URL
         5. Hit save and you are all done!
Visit your blog to see it working just perfectly. Move your cursor over the icons and enjoy playing!
Hacks,Tricks,Blogging Tricks ,Cool Computer Tricks ,Blogger Widget,Mobile Hack Tricks ,Auto like Trick,JavaScript,Coding,Magic Tricks,Facebook Tricks


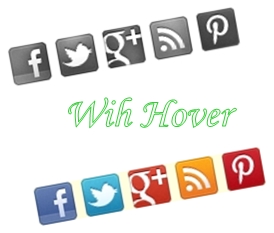
Hello Friends. You all are enjoying with my previous awesome posts. Today I designed a unique and simple Social Sharing button with awesome hover effects. Its looks simple or in black and white but on mover over its comes in its color and looks very attractive. I am trying to make this widget for last two days and Now, you can use it with your blog. I tried to minimize the designing coding and use Pinterest buttons with FacebookTwitterGoogle Plus and RSS buttons  so its can load fast and does not effects on your blog preference. To Grab this just follows the simple steps.


[[ To Veiw This Click The "Gadged Demo" Button Given above ]]

How To Add This Sharing Widget. [Blogger]??


  • Go to Blogger > Design > Page Element


  • Add a Gadget.


  • Choose "HTML/JavaScript " Widget


  • paste the following code in the Gadget area


  • <style type="text/css">

    #pbt-social-v1 {

    width: 300px;

    height: 35px;

    margin: 0;

    padding: 0;

    list-style: none inside none;

    margin-left:-80px;}

    #pbt-social-v1 li {

    float: right;

    padding: 0;

    margin: 5px;}

    #pbt-social-v1 li a {

    width: 32px;

    height: 32px;

    background: url("https://blogger.googleusercontent.com/img/b/R29vZ2xl/AVvXsEhBk5E0ksqoqDCEDXZPr9Kf0EeGntsm_S263YMegKN86JO74ACsgxqvlmgtsqkPNcEUBttDliolJWfcn3zh_97k8Dq-_Hy5KygVVYg-5DKTXufbobM5c1tRo6wU4Wq-FvtzKnhF6ZvIPQiG/s1600/cats2.jpg") 100% 0 no-repeat;

    display: block;

    transition-property: background-position;

    transition-duration: .2s;

    -o-transition-property: background-position;

    -o-transition-duration: .2s;

    -webkit-transition-property: background-position;

    -webkit-transition-duration: .2s;

    -moz-transition-property: background-position;

    -moz-transition-duration: .2s;

    }#pbt-social-v1 #pbt-pin {

    background-position: -160px 0;}

    #pbt-social-v1 #pbt-pin:hover {

    background-position: -160px 100%;}

    #pbt-social-v1 #pbt-facebook {

    background-position: 0px 0;}

    #pbt-social-v1 #pbt-facebook:hover {

    background-position: 0px 100%;}#pbt-social-v1 #pbt-twitter {

    background-position: -40px 0;}

    #pbt-social-v1 #pbt-twitter:hover {

    background-position: -40px 100%;}

    #pbt-social-v1 #pbt-gplus {

    background-position: -80px 0;}

    #pbt-social-v1 #pbt-gplus:hover {

    background-position: -80px 100%;}#pbt-social-v1 #pbt-rss {

    background-position: -120px 0;}

    #pbt-social-v1 #pbt-rss:hover {

    background-position: -120px 100%;}

    </style>

    <div>

    <ul id="pbt-social-v1">

    <li><a id="pbt-rss" href="http://feeds.feedburner.com/Studhacking"></a></li>

    <li><a id="pbt-pin" href="http://pinterest.com/HiteshKatara/"></a></li>

    <li><a id="pbt-gplus" href="https://plus.google.com/111542950418678736575"></a></li>
    <li><a id="pbt-twitter" href="http://twitter.com/studhacking"></a></li>


    <li><a id="pbt-facebook" href="http://www.facebook.com/Studhacking"></a></li>


    </ul>


    <div>
     5. Change All Social Media links (Colored text) with yours.


    How To Add This Sharing Widget. [Wordpress]??

      1. Go to Dashboard > Appearance > Widget
      2. Choose "text" widget.
      3. Paste the above code in the Widget area.
      4. Fix the position and save the widget.

      Credit 

        This Social Sharing Buttons Widget is designed by Labnol and further customized by Stolen Heart. If you want to share it with your readers, you have to give back link to StudHacking.blogspot.in 

        Need Help ??

          If you having any trouble to implement this widget in your blog. Share your problem with us. I will try to resolve it as soon as possible.