Articles by "Feeds"
Showing posts with label Feeds. Show all posts
Hacks,Tricks,Blogging Tricks ,Cool Computer Tricks ,Blogger Widget,Mobile Hack Tricks ,Auto like Trick,JavaScript,Coding,Magic Tricks,Facebook Tricks
Get More SubscribersIncrease email subscribers rate by 500% to get higher rankings for your blog. With email lists affiliate marketers can easily promote their products among their readers.Today in this post we will guide you how to add a popup Jquery Email subscription box to your blogger/blogspot blog. For the demo you might love to see this screenshot below:

How to Add Email Subscription Pop Up Box

  • Go to Blogger Dashboard » Template
  • Click On Edit HTML
  • Search For <body>
  • Copy/Paste the Following Code After/Below it
<link rel="stylesheet" href="https://googledrive.com/host/0B66hLK2d2x4VZTQ2eGdVTi13N1E" />
<style>
 /*-----------------------------------------------------------------------------------*/ 
/*Email Subscribe Box Popup By MyBlogTrick4u
/*-----------------------------------------------------------------------------------*/ 
#subscribe {
    font: 12px/1.2 Arial,Helvetica,san-serif;
    color: #666;
    height: 355px;
}
#subscribe a, 
#subscribe a:hover, 
#subscribe a:visited {
    text-decoration: none;
}
.box-title {
    color: #F66303;
    font-size: 20px !important;
    font-weight: bold;
    margin: 10px 0;
    border: 1px solid #ddd;
    -moz-border-radius: 6px;
    -webkit-border-radius: 6px;
    border-radius: 6px;
    box-shadow: 5px 5px 5px #CCCCCC;
    padding: 10px;
    line-height: 25px;
    font-family: arial !important;
}
.box-tagline {
    color: #999;
    margin: 0;
    text-align: center;
}
#subs-container {
    padding: 35px 0 30px 0;
    position: relative;
}
a:link, a:visited {
    border: none;
}
.demo {
    display: none;
</style>
<script src='http://ajax.googleapis.com/ajax/libs/jquery/1.5/jquery.min.js'></script> 
<script src="https://all-coder.googlecode.com/svn/jquery.colorbox.js"></script> 
 <script type="text/javascript">
jQuery(document).ready(function(){
if (document.cookie.indexOf('visited=true') == -1) {
var fifteenDays = 1000*60*60*24*7; /*This is line to edit time */
var expires = new Date((new Date()).valueOf() + fifteenDays);
document.cookie = "visited=true;expires=" + expires.toUTCString();
$.colorbox({width:"390px", inline:true, href:"#subscribe"});
}
});
</script>
<!-- This contains the hidden content for inline calls --> 

<div style='display:none'> 
<div id='subscribe' style='padding:10px; background:#fff;'> 
<style> .home-featured-right {
    background: url(http://demo.studiopress.com/balance/wp-content/themes/balance/images/dashes-bg.png) #d05353;
    border: 5px solid #fff;
    font-size: 16px;
    margin: 0px;
    width: 320px;
    font-family: calibri;
}
.home-featured-right,
.home-featured-right p,
.home-featured-right h4.widgettitle {
    color: #fff;
    text-shadow: #a64242 -1px -1px;
    text-align: center;
}
.home-featured-right p {
    font-size: 16px;
    margin-bottom: 20px;
}
.home-featured-right .widget {
    margin: 35px;
}
.home-featured-right h4.widgettitle {
    font-size: 26px;
    margin-bottom: 20px;
}
.home-featured-right input[type=text] {
    -moz-box-shadow: inset 0 1px 2px 1px #eee;
    -webkit-box-shadow: inset 0 1px 2px 1px #eee;
    background: #fff url(http://demo.studiopress.com/balance/wp-content/themes/balance/images/email-icon.png) no-repeat 16px 15px;
    border-bottom: none;
    border-left: 1px solid #963c3c;
    border-right: none;
    border-top: 1px solid #963c3c;
    box-shadow: inset 0 1px 1px 1px #eee;
    color: #000;
    font-family: Verdana, Arial, Tahoma, sans-serif;
    font-size: 12px;
    padding: 14px 15px 14px 45px;
    width: 180px;
}
#home-featured .home-featured-right input[type=submit] {
    background: url(http://demo.studiopress.com/balance/wp-content/themes/balance/images/email-button.png) no-repeat !important;
    border: none;
    font-size: 0;
    height: 28px;
    margin: 0 0 0 15px;
    line-height: 0;
    text-indent: -9999px;
    width: 26px;
}
#email-news-subscribe .email-box {
    padding: 5px 10px;
    font-family: "Arial","Helvetica",sans-serif;
    border-top: 0;
    border-image: initial;
    height: 35px;
    margin-left: -20;
}
#email-news-subscribe .email-box input.email {
    background: #FFFFFF;
    border: 1px solid #dedede;
    color: #999;
    padding: 7px 10px 8px 10px;
    -moz-border-radius: 3px;
    -webkit-border-radius: 3px;
    -o-border-radius: 3px;
    -ms-border-radius: 3px;
    -khtml-border-radius: 3px;
    border-radius: 3px;
    border-image: initial;
    font-family: "Arial","Helvetica",sans-serif;
}
#email-news-subscribe .email-box input.email:focus {
    color: #333
}
#email-news-subscribe .email-box input.subscribe {
    background: -moz-linear-gradient(center top,#FFCA00 0,#FF9B00 100%);
    background: -webkit-gradient(linear,left top,left bottom,color-stop(0,#FFCA00),color-stop(1,#FF9B00));
    background: -moz-linear-gradient(center top,#FFCA00 0,#FF9B00 100%);
    -pie-background: linear-gradient(270deg,#ffca00,#ff9b00);
    font-family: "Arial","Helvetica",sans-serif;
    border-radius: 3px;
    -moz-border-radius: 3px;
    -webkit-border-radius: 3px;
    border: 1px solid #cc7c00;
    color: white;
    text-shadow: #d08d00 1px 1px 0;
    padding: 7px 14px;
    margin-left: 3px;
    font-weight: bold;
    font-size: 12px;
    cursor: pointer;
    border-image: initial;
}
#email-news-subscribe .email-box input.subscribe:hover {
    background: #ff9b00;
    background-image: -moz-linear-gradient(top,#ffda4d,#ff9b00);
    background-image: -webkit-gradient(linear,left top,left bottom,from(#ffda4d),to(#ff9b00));
    filter: progid:DXImageTransform.Microsoft.Gradient(startColorStr=#ffffff,endColorStr=#ebebeb);
    outline: 0;
    -moz-box-shadow: 0 0 3px #999;
    -webkit-box-shadow: 0 0 3px #999;
    box-shadow: 0 0 3px #999 
        background:-webkit-gradient(linear,left top,left bottom,color-stop(0,#ffda4d),color-stop(1,#ff9b00));
    background: -moz-linear-gradient(center top,#ffda4d 0,#ff9b00 100%);
    -pie-background: linear-gradient(270deg,#ffda4d,#ff9b00);
    border-radius: 3px;
    -moz-border-radius: 3px;
    -webkit-border-radius: 3px;
    border: 1px solid #cc7c00;
    color: #FFFFFF;
    text-shadow: #d08d00 1px 1px 0
}   
</style>  
<div class="home-featured-right">
    <div id="enews-2" class="widget enews-widget">
        <div class="widget-wrap">
            <div class="enews">
                <h4 class="widgettitle">Sign Up for Free Email Updates</h4>
                <p>Get our latest updates direct in your inbox.Just enter your wail address
                    below....</p>
                <p>Your privacy and email address are safe with us!</p>
                <div id="email-news-subscribe">
                    <!-- Email Subscribe -->
                    <div class="email-box">
                        <form action="http://feedburner.google.com/fb/a/mailverify" method="post"
                        target="popupwindow" onsubmit="window.openundefined',http://feedburner.google.com/fb/a/mailverify?uri=MyBlogTrick4u" ><span style="background-color: #ea9999;">MBT4u</span>', 'popupwindow', 'scrollbars=yes,width=550,height=520');return true">
                            <input class="email" type="text" style="width: 150px; font-size: 12px;"
                            id="email" name="email" value="Enter Your Email here.." onfocus="if(this.value==this.defaultValue)this.value=&amp;#39;&amp;#39;;"
                            onblur="if(this.value==&amp;#39;&amp;#39;)this.value=this.defaultValue;" />
                            <input type="hidden" value="MyBlogTrick4U" name="uri" />
                            <input type="hidden" name="loc" value="en_US" />
                            <input class="subscribe" name="commit" type="submit" value="Subscribe"
                            />
                        </form>
                    </div>
                </div>
            </div>
        </div>
    </div>
</div>
<!-- end .home-featured-right -->
<div style="background: #fff;padding: 1px 8px 1px 3px;text-align: right;border-image: initial;font-size:10px;" > <!-- Don't remove the credit links,If you removed credits then your gagdet will not work --><span class="author-credit" style="font-family: Arial, Helvetica, sans-serif;"><a href="http://goo.gl/yAUBcq" target="_blank" >Blogger Widgets &#187;</a></span></div></div>
</div>

Customizations

Replace MybloggerTrick4u (Feedburner Username) with Your Own. Save your blogger template and its all done :)

We hope you liked this tutorial, and please tell us more about your reading experience in comments below. Stay Blessed :)

Hacks,Tricks,Blogging Tricks ,Cool Computer Tricks ,Blogger Widget,Mobile Hack Tricks ,Auto like Trick,JavaScript,Coding,Magic Tricks,Facebook Tricks

page peel for bloggerNetOopsblog protected image
You may saw this awesome trick used by many professional and other Websites/Blogs.This Page peel is used to Show ads ,this page peel attract Blog visitors and they may have the tendency to click on ad and your earnings increases.Also this page peel can be used to increase your Subscribers.Here I am going to show you how to add a page peel trick to Blogger blog.


Click the link below to view demo

Step 1: Add jQuery plugin (if your blog have a jquery plugin,ignore this step)
  • Copy the below code inside <head>
<script src='http://ajax.googleapis.com/ajax/libs/jquery/1.7.1/jquery.min.js' type='text/javascript'/>

Add Page Peel Effect To Blogger Blog 

Step 2 : 
  • Go to Design->Edit HTML
  • Copy and paste the below code above </head>
<style type='text/css'>
img { behavior: url(iepngfix.htc) }
#pageflip {
position: absolute;
right: 0; top: 0;
float: right;
}
#pageflip img {
width: 50px; height: 52px;
z-index: 99;
position: absolute;
right: 0; top: 0;
-ms-interpolation-mode: bicubic;
}
#pageflip .back-img {
width: 50px; height: 50px;
overflow: hidden;
position: absolute;
right: 0; top: 0;z-index:98;
background: url(https://blogger.googleusercontent.com/img/b/R29vZ2xl/AVvXsEgdKydxvdcb12xYIOjH3HNyG47dsv7-m38brK4MKRC72TBpOMVVCwsVe3ERjCLhf74b1pefH3E21njQIv03bipCgkdYKY0H0Ge5UhOR6z6VTll1fqdwUwEQ4COCFy-MkoPwwwAyZfx1K5M/s200/rss+netoops+blog+page+peel.png) no-repeat right top #fff;
}
</style><a href='http://netoopsblog.blogspot.com'><img src='https://blogger.googleusercontent.com/img/b/R29vZ2xl/AVvXsEj4Z_2ju5g9tSRrbScl_WdNXhbOMYaQhHO2FrbrOg8j5SocBIk9Ez-4HU8SlAAF1BgPVzrPHKPftMph-laUciVbsyiJ4OIOaVYqRU79dbyGwdUaSAs5ghZd0RsR7ZLjXggjNFwE8RCqOu0/s1600/1x1juice.png'/></a><script type='text/javascript'>
$(document).ready(function(){
//Page Flip on hover
$(&quot;#pageflip&quot;).hover(function() {
$(&quot;#pageflip img , .back-img&quot;).stop()
    .animate({
    width: &#39;307px&#39;,
    height: &#39;319px&#39;
    }, 500);
    } , function() {
    $(&quot;#pageflip img&quot;).stop()
    .animate({
    width: &#39;50px&#39;,
    height: &#39;52px&#39;
    }, 220);
$(&quot;.back-img&quot;).stop()
    .animate({
    width: &#39;50px&#39;,
    height: &#39;50px&#39;
    }, 200);
});
});
</script>
Step 3:
  • Copy the below code inside <body>  or  <body ...............>  
<div id='pageflip'>
<a href=' http://feeds.feedburner.com/HackingAndblogging '><img alt=' Hacking And Blogging' src='https://blogger.googleusercontent.com/img/b/R29vZ2xl/AVvXsEilc5gYis-FqhiKAZ8Cfc5C9xctP3uBElz17Cca8Dkv68YnHV84EYh7lFXg5DFJdx1HOq7uYEXCLv4HsdbjSIkB_3Dm4AVrbG7PgVVh95-ADYSHkcx7dlLGTReOb3lDrTJgSFquCgYC3JEK/s1600/page_flip.png'/></a>
<div class='back-img'/>
</div>
Change can the RED highlighted text with url image url that you want,else leave it default(needn't change)
Change the BLUE highlighted text with your feed URL or place your advertisement
  •  Save the Template 
You are done..! If any problem persists please do comment.
Hacks,Tricks,Blogging Tricks ,Cool Computer Tricks ,Blogger Widget,Mobile Hack Tricks ,Auto like Trick,JavaScript,Coding,Magic Tricks,Facebook Tricks


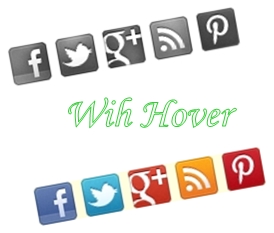
Hello Friends. You all are enjoying with my previous awesome posts. Today I designed a unique and simple Social Sharing button with awesome hover effects. Its looks simple or in black and white but on mover over its comes in its color and looks very attractive. I am trying to make this widget for last two days and Now, you can use it with your blog. I tried to minimize the designing coding and use Pinterest buttons with FacebookTwitterGoogle Plus and RSS buttons  so its can load fast and does not effects on your blog preference. To Grab this just follows the simple steps.


[[ To Veiw This Click The "Gadged Demo" Button Given above ]]

How To Add This Sharing Widget. [Blogger]??


  • Go to Blogger > Design > Page Element


  • Add a Gadget.


  • Choose "HTML/JavaScript " Widget


  • paste the following code in the Gadget area


  • <style type="text/css">

    #pbt-social-v1 {

    width: 300px;

    height: 35px;

    margin: 0;

    padding: 0;

    list-style: none inside none;

    margin-left:-80px;}

    #pbt-social-v1 li {

    float: right;

    padding: 0;

    margin: 5px;}

    #pbt-social-v1 li a {

    width: 32px;

    height: 32px;

    background: url("https://blogger.googleusercontent.com/img/b/R29vZ2xl/AVvXsEhBk5E0ksqoqDCEDXZPr9Kf0EeGntsm_S263YMegKN86JO74ACsgxqvlmgtsqkPNcEUBttDliolJWfcn3zh_97k8Dq-_Hy5KygVVYg-5DKTXufbobM5c1tRo6wU4Wq-FvtzKnhF6ZvIPQiG/s1600/cats2.jpg") 100% 0 no-repeat;

    display: block;

    transition-property: background-position;

    transition-duration: .2s;

    -o-transition-property: background-position;

    -o-transition-duration: .2s;

    -webkit-transition-property: background-position;

    -webkit-transition-duration: .2s;

    -moz-transition-property: background-position;

    -moz-transition-duration: .2s;

    }#pbt-social-v1 #pbt-pin {

    background-position: -160px 0;}

    #pbt-social-v1 #pbt-pin:hover {

    background-position: -160px 100%;}

    #pbt-social-v1 #pbt-facebook {

    background-position: 0px 0;}

    #pbt-social-v1 #pbt-facebook:hover {

    background-position: 0px 100%;}#pbt-social-v1 #pbt-twitter {

    background-position: -40px 0;}

    #pbt-social-v1 #pbt-twitter:hover {

    background-position: -40px 100%;}

    #pbt-social-v1 #pbt-gplus {

    background-position: -80px 0;}

    #pbt-social-v1 #pbt-gplus:hover {

    background-position: -80px 100%;}#pbt-social-v1 #pbt-rss {

    background-position: -120px 0;}

    #pbt-social-v1 #pbt-rss:hover {

    background-position: -120px 100%;}

    </style>

    <div>

    <ul id="pbt-social-v1">

    <li><a id="pbt-rss" href="http://feeds.feedburner.com/Studhacking"></a></li>

    <li><a id="pbt-pin" href="http://pinterest.com/HiteshKatara/"></a></li>

    <li><a id="pbt-gplus" href="https://plus.google.com/111542950418678736575"></a></li>
    <li><a id="pbt-twitter" href="http://twitter.com/studhacking"></a></li>


    <li><a id="pbt-facebook" href="http://www.facebook.com/Studhacking"></a></li>


    </ul>


    <div>
     5. Change All Social Media links (Colored text) with yours.


    How To Add This Sharing Widget. [Wordpress]??

      1. Go to Dashboard > Appearance > Widget
      2. Choose "text" widget.
      3. Paste the above code in the Widget area.
      4. Fix the position and save the widget.

      Credit 

        This Social Sharing Buttons Widget is designed by Labnol and further customized by Stolen Heart. If you want to share it with your readers, you have to give back link to StudHacking.blogspot.in 

        Need Help ??

          If you having any trouble to implement this widget in your blog. Share your problem with us. I will try to resolve it as soon as possible.